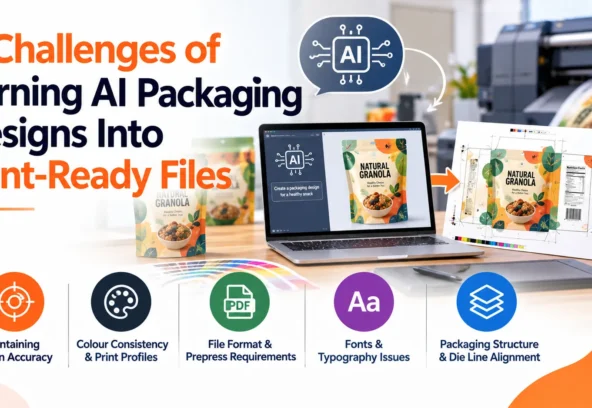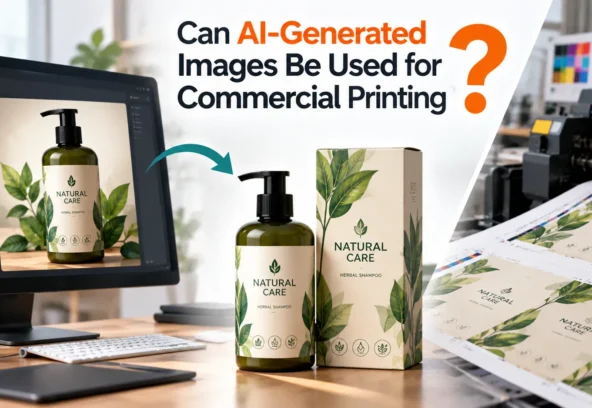

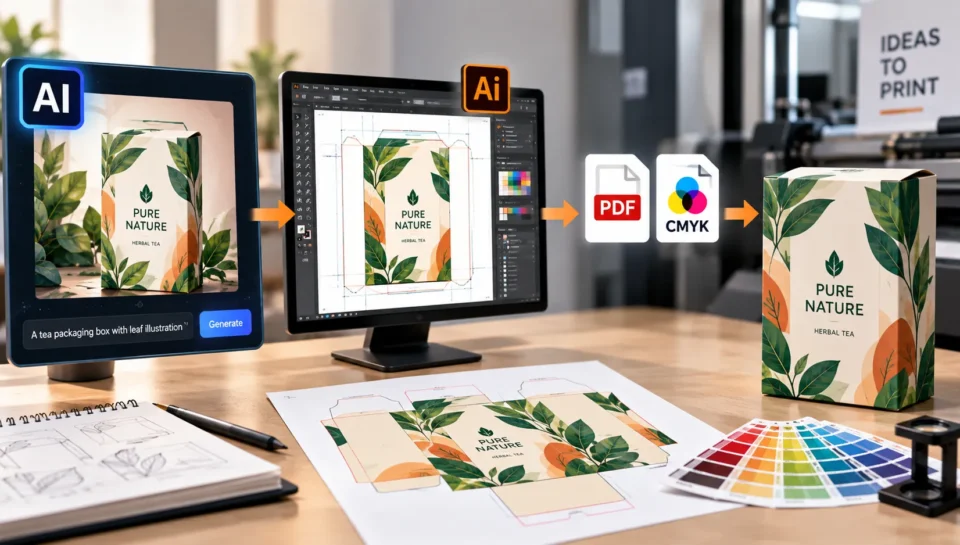
AI image generators have made it incredibly easy to create impressive visuals in seconds. A prompt can produce a product illustration, packaging concept, advertisement, poster, label, or brand visual that looks excellent on a screen.
But there is a major difference between an AI-generated image and a print-ready file.
An image downloaded from an AI tool is usually not automatically prepared for professional printing. It may have insufficient resolution, RGB colours, missing bleed, rasterised text, incorrect dimensions, or other technical limitations.
Before sending it to a printer, the image needs to be professionally prepared for its intended print process.
This process is commonly called artwork preparation or prepress.
Modern design software is also making this workflow more efficient. For example, Adobe Illustrator now includes AI-assisted features that can transform raster references into editable vector artwork and expand artwork to create additional space or print bleed.
Quick Answer: How Do You Make an AI Image Print-Ready?
To convert an AI-generated image into a print-ready file:
- Determine the final print size.
- Check the image’s effective resolution.
- Upscale or recreate artwork where necessary.
- Convert appropriate elements to editable vector artwork.
- Set up the correct CMYK or spot-colour workflow.
- Add the required bleed and safe area.
- Recreate or correct typography.
- Add the correct dieline for packaging.
- Check barcodes, QR codes, logos, and other critical elements.
- Export using the printer’s required file format.
- Perform a final prepress or preflight review.
The exact specifications should always come from the printer because requirements can vary depending on the printing method, substrate, package structure, and finishing process.
Why AI-Generated Images Are Not Automatically Print-Ready
AI image generators are primarily designed to create visual content—not necessarily production artwork.
An AI-generated image might be:
- A JPG or PNG
- RGB rather than CMYK
- Too small for the intended print size
- Completely raster-based
- Missing bleed
- Missing a dieline
- Difficult to edit
- Contain distorted text
- Contain inaccurate logos
- Have unsuitable colour values
- Lack separate layers for special finishes
For example, a 1024-pixel image may look perfectly acceptable when viewed on a website but become soft or pixelated when enlarged for a large package or poster.
Similarly, a beautiful AI packaging concept isn’t necessarily a file that a packaging manufacturer can place directly into production.
Step 1: Decide the Final Print Size First
Before preparing the AI artwork, establish exactly where it will be used.
For example:
- Product label
- Folding carton
- Flexible pouch
- Standee
- Brochure
- Poster
- Retail display
- Box
- Sticker
- Advertisement
The required dimensions affect almost every subsequent decision.
If the final package is 200 × 150 mm, preparing an image without knowing those dimensions makes it difficult to determine whether the source image has sufficient resolution.
Always prepare artwork for its actual production dimensions rather than simply enlarging an AI image and hoping it will remain sharp.
Step 2: Check the Image Resolution
Resolution is one of the first things to check.
For many professional print applications, 300 PPI at final size is a common target for raster imagery, although the appropriate resolution depends on the printing process and viewing distance. Current packaging artwork guidelines from print suppliers commonly specify 300 DPI/PPI for raster images at final size.
The important phrase is at final size.
For example, an image that is 300 PPI at 100% size effectively becomes 150 PPI if it is enlarged to 200% without adding additional image data.
If the AI-generated image is too small, you have several options:
- AI upscaling
- High-quality resampling
- Recreating important elements as vectors
- Rebuilding the artwork manually
- Generating a higher-resolution source
Upscaling can improve an image, but it cannot magically recreate every missing detail perfectly.
Step 3: Convert Important Artwork Into Vector Elements
This is particularly important for logos, icons, typography, illustrations, and packaging graphics.
Vector artwork can be scaled without the same pixelation associated with raster images.
Modern Illustrator AI tools include Concept to Vector, which can transform raster references into editable vector artwork, as well as Text to Vector Graphic and other vector-generation capabilities.
A practical workflow may therefore look like:
AI Image → Reference → Vector Recreation → Artwork Refinement → Print File
Not every part of an AI image needs to become vector artwork. Photographic elements can remain raster images when they have sufficient resolution.
Step 4: Fix AI-Generated Text and Logos
This is one of the most important steps.
AI-generated images can produce text that looks convincing at first glance but contains:
- Misspellings
- Incorrect letters
- Strange characters
- Inconsistent typography
- Distorted words
- Incorrect brand names
For packaging, this can become a serious problem.
Instead of relying on text generated inside the AI image, recreate the text using professional design software.
The same applies to logos.
Do not use an AI-generated version of a company logo simply because it looks similar.
Use the original approved brand asset.
Step 5: Set Up the Correct Colour Workflow
AI image generators commonly produce RGB images because they are intended for digital viewing.
Professional print workflows may require CMYK and/or specific spot colours.
A printer may have its own colour profile and production specifications, so the correct approach isn’t simply:
“Convert everything to CMYK and you’re done.”
Instead, confirm the printer’s requirements before finalising the artwork.
For packaging, a file may use CMYK plus spot colours for brand colours, white ink, foil, or other special production elements.
Current packaging artwork guidelines commonly specify CMYK or defined spot colours, depending on the printing process.
Step 6: Add Bleed and Safe Areas
An AI image usually doesn’t understand the physical cutting requirements of a printed product.
Bleed extends artwork beyond the final trim edge so that small cutting variations don’t leave unwanted unprinted edges.
Safe areas protect important elements such as:
- Logos
- Product names
- Legal copy
- Important claims
- Barcodes
The required bleed varies by printer and product.
For example, some packaging suppliers specify 3 mm bleed, while certain packaging structures may require more.
Adobe Illustrator’s current AI workflow can also generate artwork to fill a defined print-bleed area using Generative Expand.
However, generated bleed should still be visually reviewed before production.
Step 7: Add the Packaging Dieline
If the AI image is being converted into packaging artwork, the dieline becomes essential.
A dieline identifies elements such as:
- Cut lines
- Fold lines
- Creases
- Glue areas
- Perforations
- Windows
- Panels
The artwork must be positioned correctly against the approved production structure.
A package may look perfect as a flat visual but become unusable if important content sits across a fold or gets too close to a cut.
For packaging, the dieline should come from the printer, packaging manufacturer, or approved structural design—not be guessed from an AI image.
Step 8: Prepare Barcodes and QR Codes Separately
If the design contains a barcode or QR code, don’t simply rely on an AI-generated version.
Generate the correct code using the required data and prepare it according to the printer and applicable standards.
GS1 guidance highlights factors such as symbol size, contrast, quiet zones, positioning, and print quality as important to barcode performance.
The code should also be tested after it has been placed into the final artwork.
Step 9: Prepare Special Finishing Layers
Premium packaging can include:
- Foil
- Spot UV
- Embossing
- Debossing
- White ink
- Metallic ink
- Varnish
These elements normally require separate production information or layers.
For example, a spot UV area may need to be supplied as a separate spot-colour layer according to the printer’s specifications.
An AI-generated image cannot reliably communicate these manufacturing instructions by itself.
The production artwork needs to be rebuilt accordingly.
Step 10: Export the Final Print-Ready File
Once the artwork has been checked, export it in the format requested by the printer.
Common production formats can include:
- PDF/X
- AI
- EPS
- TIFF
- PSD
The appropriate format depends on the printer and project.
PDF/X standards are designed to make print exchange more predictable, but simply creating a PDF/X file does not guarantee that the artwork has correct resolution, bleed, colours, or trim geometry.
That’s why the export stage should come after technical preparation—not instead of it.
Common Mistakes When Converting AI Images for Printing
Avoid these mistakes:
Using a Low-Resolution AI Image
A visually impressive image isn’t necessarily large enough for physical printing.
Printing the AI Image Directly
An AI-generated JPG or PNG isn’t automatically a press-ready file.
Keeping RGB Without Checking Printer Requirements
Colour conversion should be planned rather than left until the final moment.
Using AI-Generated Text
Always recreate important text using controlled typography.
Ignoring the Dieline
Packaging artwork must match the actual physical structure.
Forgetting Bleed
Artwork that ends exactly at the trim line can result in unwanted edges after cutting.
Using AI-Generated Logos
Always use the approved original brand logo.
Skipping Prepress
A final technical review can identify problems that aren’t obvious during the creative design stage.
When Should You Use AI Image to Print-Ready Artwork Services?
Professional artwork preparation becomes particularly useful when you have:
- An AI-generated packaging concept
- A Midjourney or ChatGPT image
- An AI-generated product illustration
- A low-resolution marketing visual
- An existing design that needs print preparation
- Packaging artwork that needs a dieline
- Multiple SKU variations
- Artwork requiring prepress correction
- An image that needs vector recreation
The service is essentially the bridge between “I have the visual” and “I have a file my printer can use.”
How Langoor Designs Can Help
The supplied Langoor Designs reference positions the company around production-ready design, packaging, artwork, and production support. It highlights 13+ years, 50+ markets, 500+ projects, and 100+ production-ready projects.
For brands starting with AI-generated visuals, Langoor Designs can support the transition from concept to production-ready artwork through services such as:
- AI Artwork to Print-Ready Files
- Packaging Design
- Packaging Artwork
- Print-Ready Artwork Preparation
- Prepress Services
- Vector Artwork
- Label Design
- Dieline-Based Artwork
- Multi-SKU Artwork Adaptation
- Production Artwork Support
The important value is not simply converting an image from one file format to another.
It is making sure the artwork is technically prepared for its intended production process.
Frequently Asked Questions
Can an AI-generated image be printed directly?
It can be printed as an ordinary image, but that doesn’t necessarily make it suitable for professional commercial printing. Resolution, colour, dimensions, bleed, typography, file format, and printer requirements should be checked first.
How do I convert an AI image to a vector?
An AI image can be manually recreated as vector artwork or processed with AI-assisted vectorisation tools. Adobe Illustrator’s Concept to Vector can transform raster references into editable vector artwork.
Can AI-generated images be made 300 DPI?
An image can be upscaled or resampled to a 300 PPI output specification, but simply changing the DPI metadata does not create additional image detail. The artwork should be evaluated at its actual final print size.
Should AI artwork be converted to CMYK?
If the intended print workflow requires CMYK, the artwork should be prepared according to the printer’s specified colour profile and production requirements. Some projects may also require spot colours.
Can AI create packaging artwork?
AI can create packaging concepts and assist with visual development, but production-ready packaging requires additional work such as dieline setup, typography, colour management, bleed, barcode preparation, finishing layers, and prepress checks.
What file format is best for print-ready packaging?
There isn’t one universal format for every printer. AI, PDF/X, EPS, TIFF, and other formats may be requested depending on the production process. Always follow the printer’s specifications.